The Best Gluten-Free Croissant Recipe for a Cozy Weekend Bake
Gluten-free croissants are one of those recipes that sound a little dramatic at first. Buttery layers, delicate dough, chilling time, rolling, folding, more chilling — it definitely has “weekend baking project” energy.
But here is the good news: you can make beautiful gluten-free croissants at home without needing a professional bakery setup. They may not behave exactly like classic wheat croissants, because gluten-free dough has its own personality, but with the right flour blend, cold butter, patience, and a gentle touch, you can still get a flaky, tender, golden croissant that feels very worth the effort.
This recipe is cozy, practical, and realistic. Not instant. Not complicated just for the sake of being fancy. Just a slower little kitchen project for a morning when you want your apartment to smell like butter and good decisions.
What Makes Gluten-Free Croissants Different?
Traditional croissants rely on gluten to create stretchy dough that can trap steam between layers of butter. Gluten-free dough does not have that same elasticity, so it needs a little extra support.
For this recipe, a good gluten-free flour blend is important. You also want ingredients like psyllium husk and xanthan gum, which help the dough hold together and roll more smoothly.
The biggest secret is temperature. Cold dough and cold butter make better layers. If the butter gets too soft, it melts into the dough instead of creating flaky pockets. So yes, the fridge is very much part of the recipe.
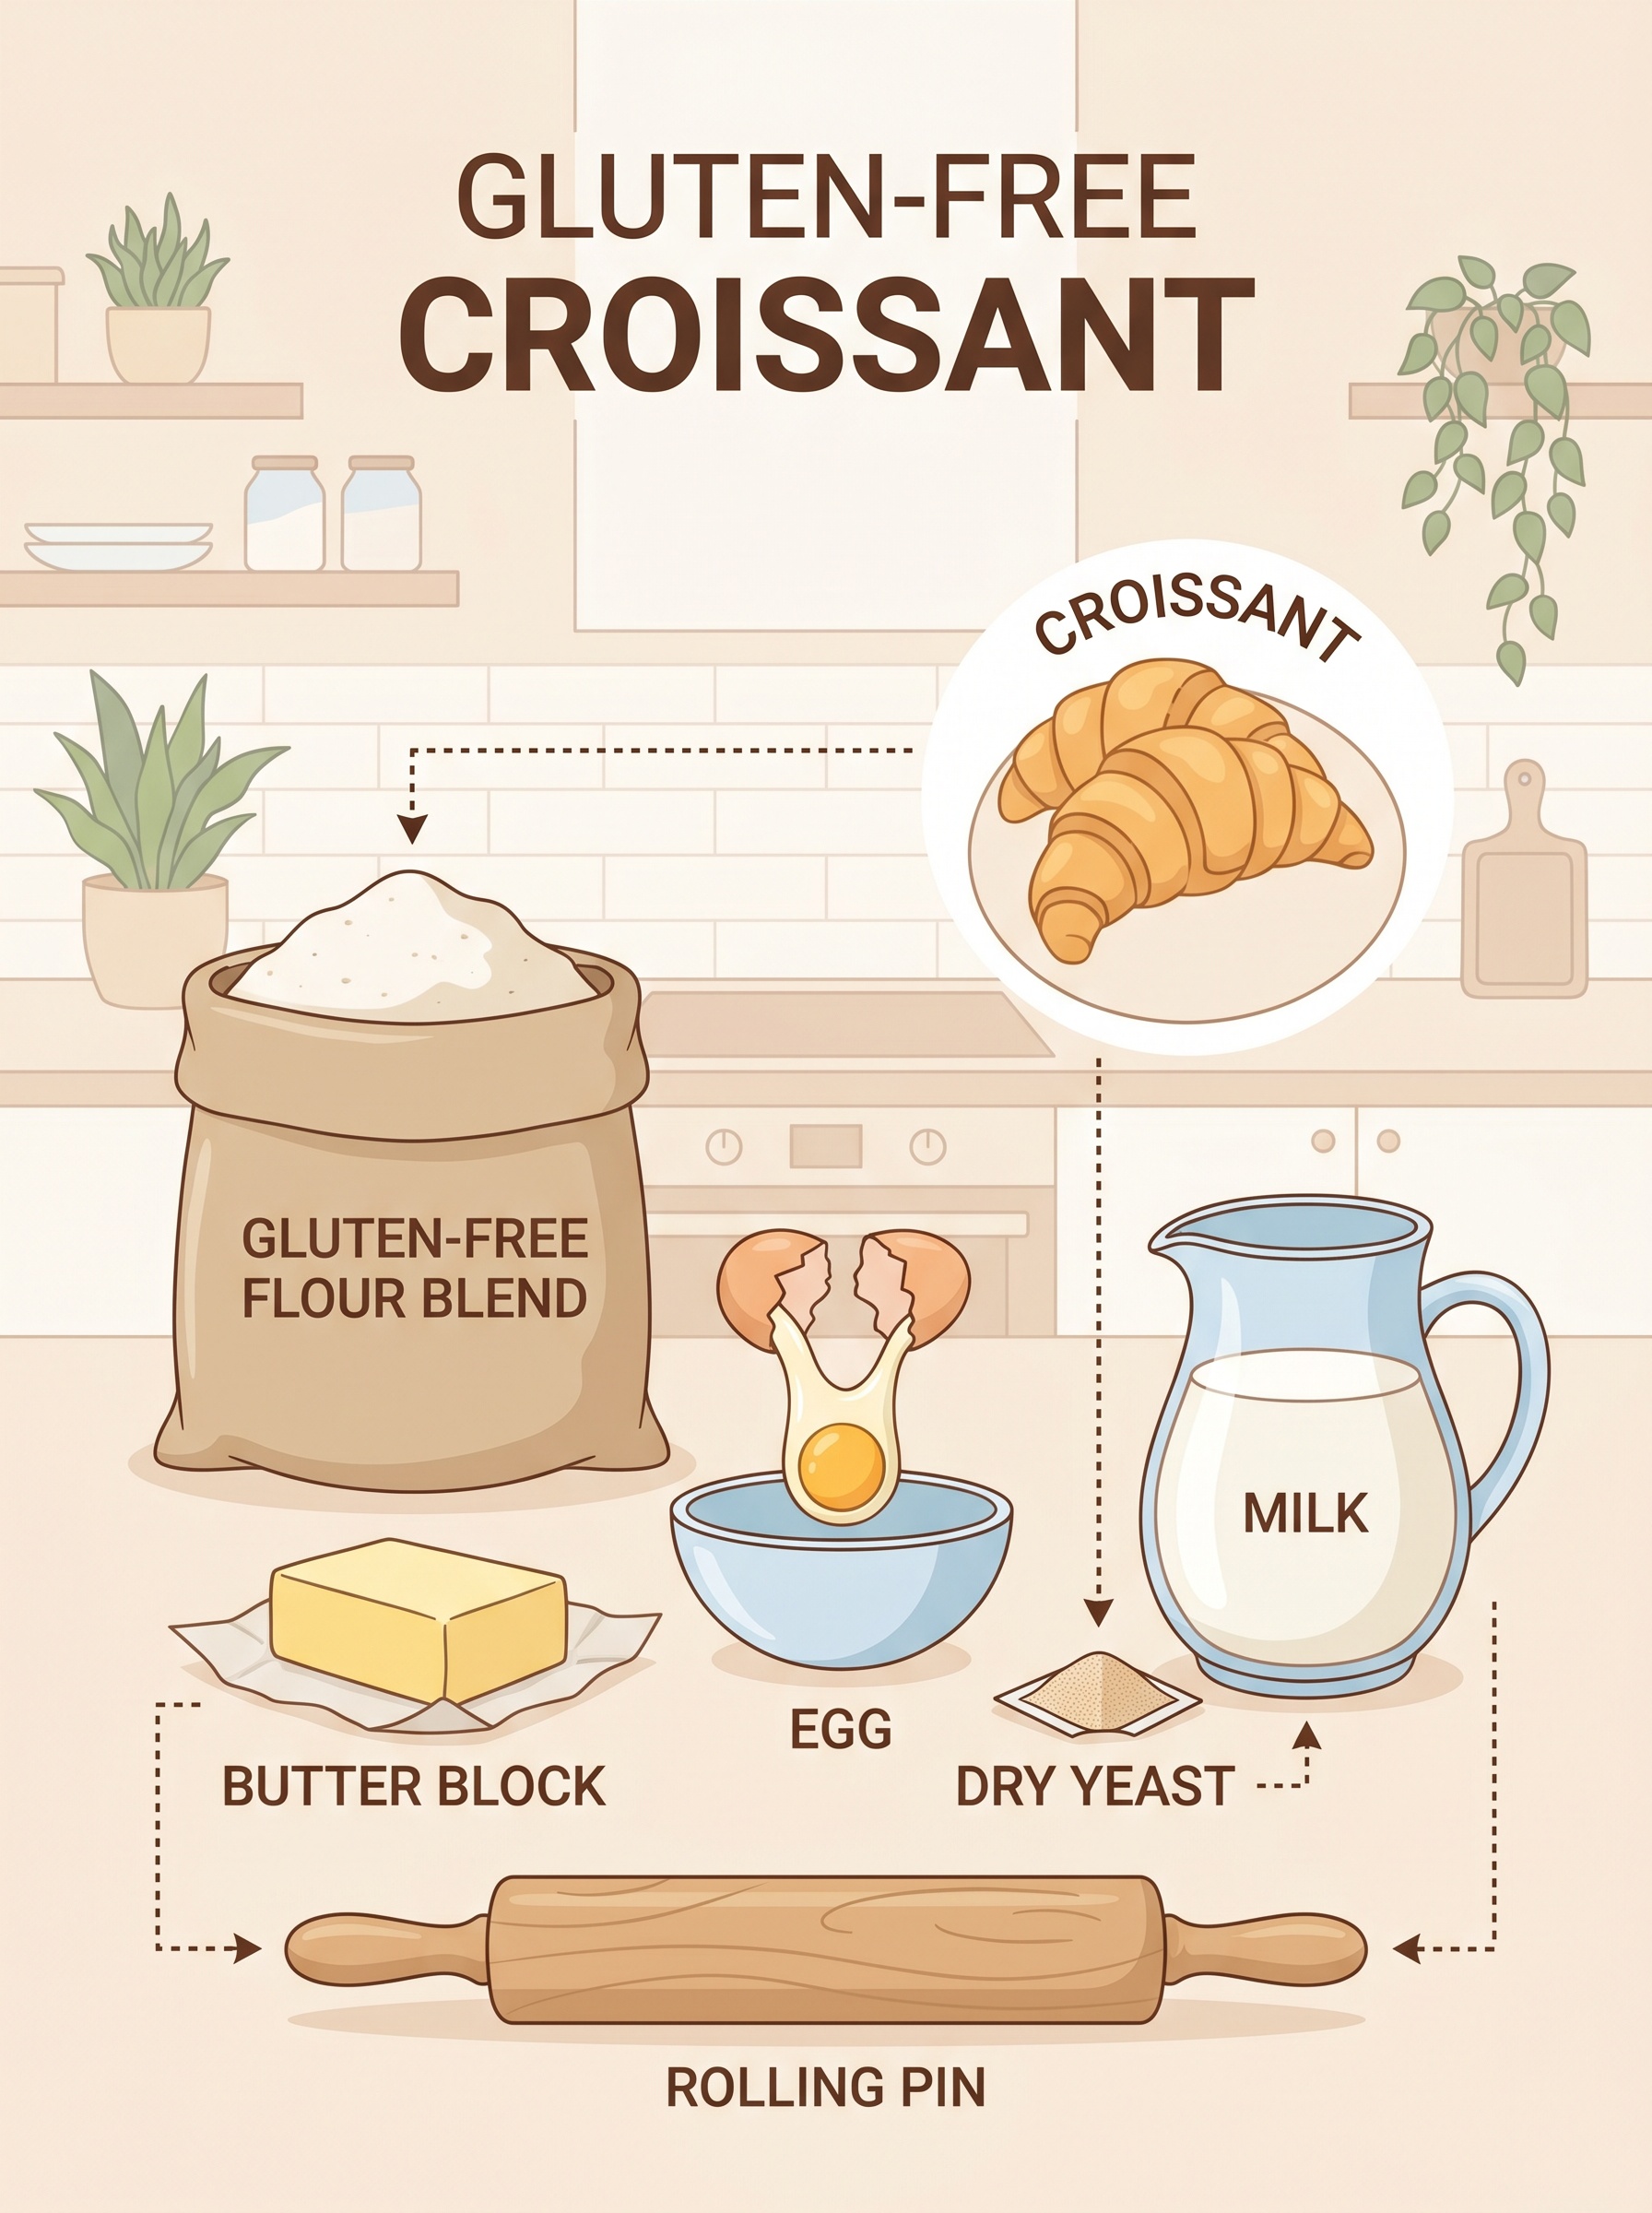
Gluten-Free Croissant Ingredients
For the dough
- 3 cups gluten-free all-purpose flour blend
- 1 tablespoon psyllium husk powder
- 1 teaspoon xanthan gum, if your flour blend does not already include it
- 2 tablespoons granulated sugar
- 2 1/4 teaspoons instant yeast
- 1 teaspoon salt
- 3/4 cup warm milk, not hot
- 1/4 cup warm water
- 1 large egg
- 3 tablespoons unsalted butter, softened
For the butter block
- 1 cup unsalted butter, cold
- 1 tablespoon gluten-free flour blend, for dusting
For the egg wash
- 1 large egg
- 1 tablespoon milk
Before You Start: A Few Helpful Tips
This is not the recipe to rush. Gluten-free croissant dough needs time to chill so it can stay workable. If the dough becomes sticky, soft, or hard to roll, place it back in the fridge for 20 to 30 minutes.
- Use cold butter: the butter should be firm but slightly bendable.
- Do not over-flour: too much flour can make the croissants dry.
- Chill often: cold dough is much easier to handle.
- Roll gently: gluten-free dough can crack if forced too quickly.
- Expect rustic beauty: homemade gluten-free croissants do not need to look bakery-perfect.
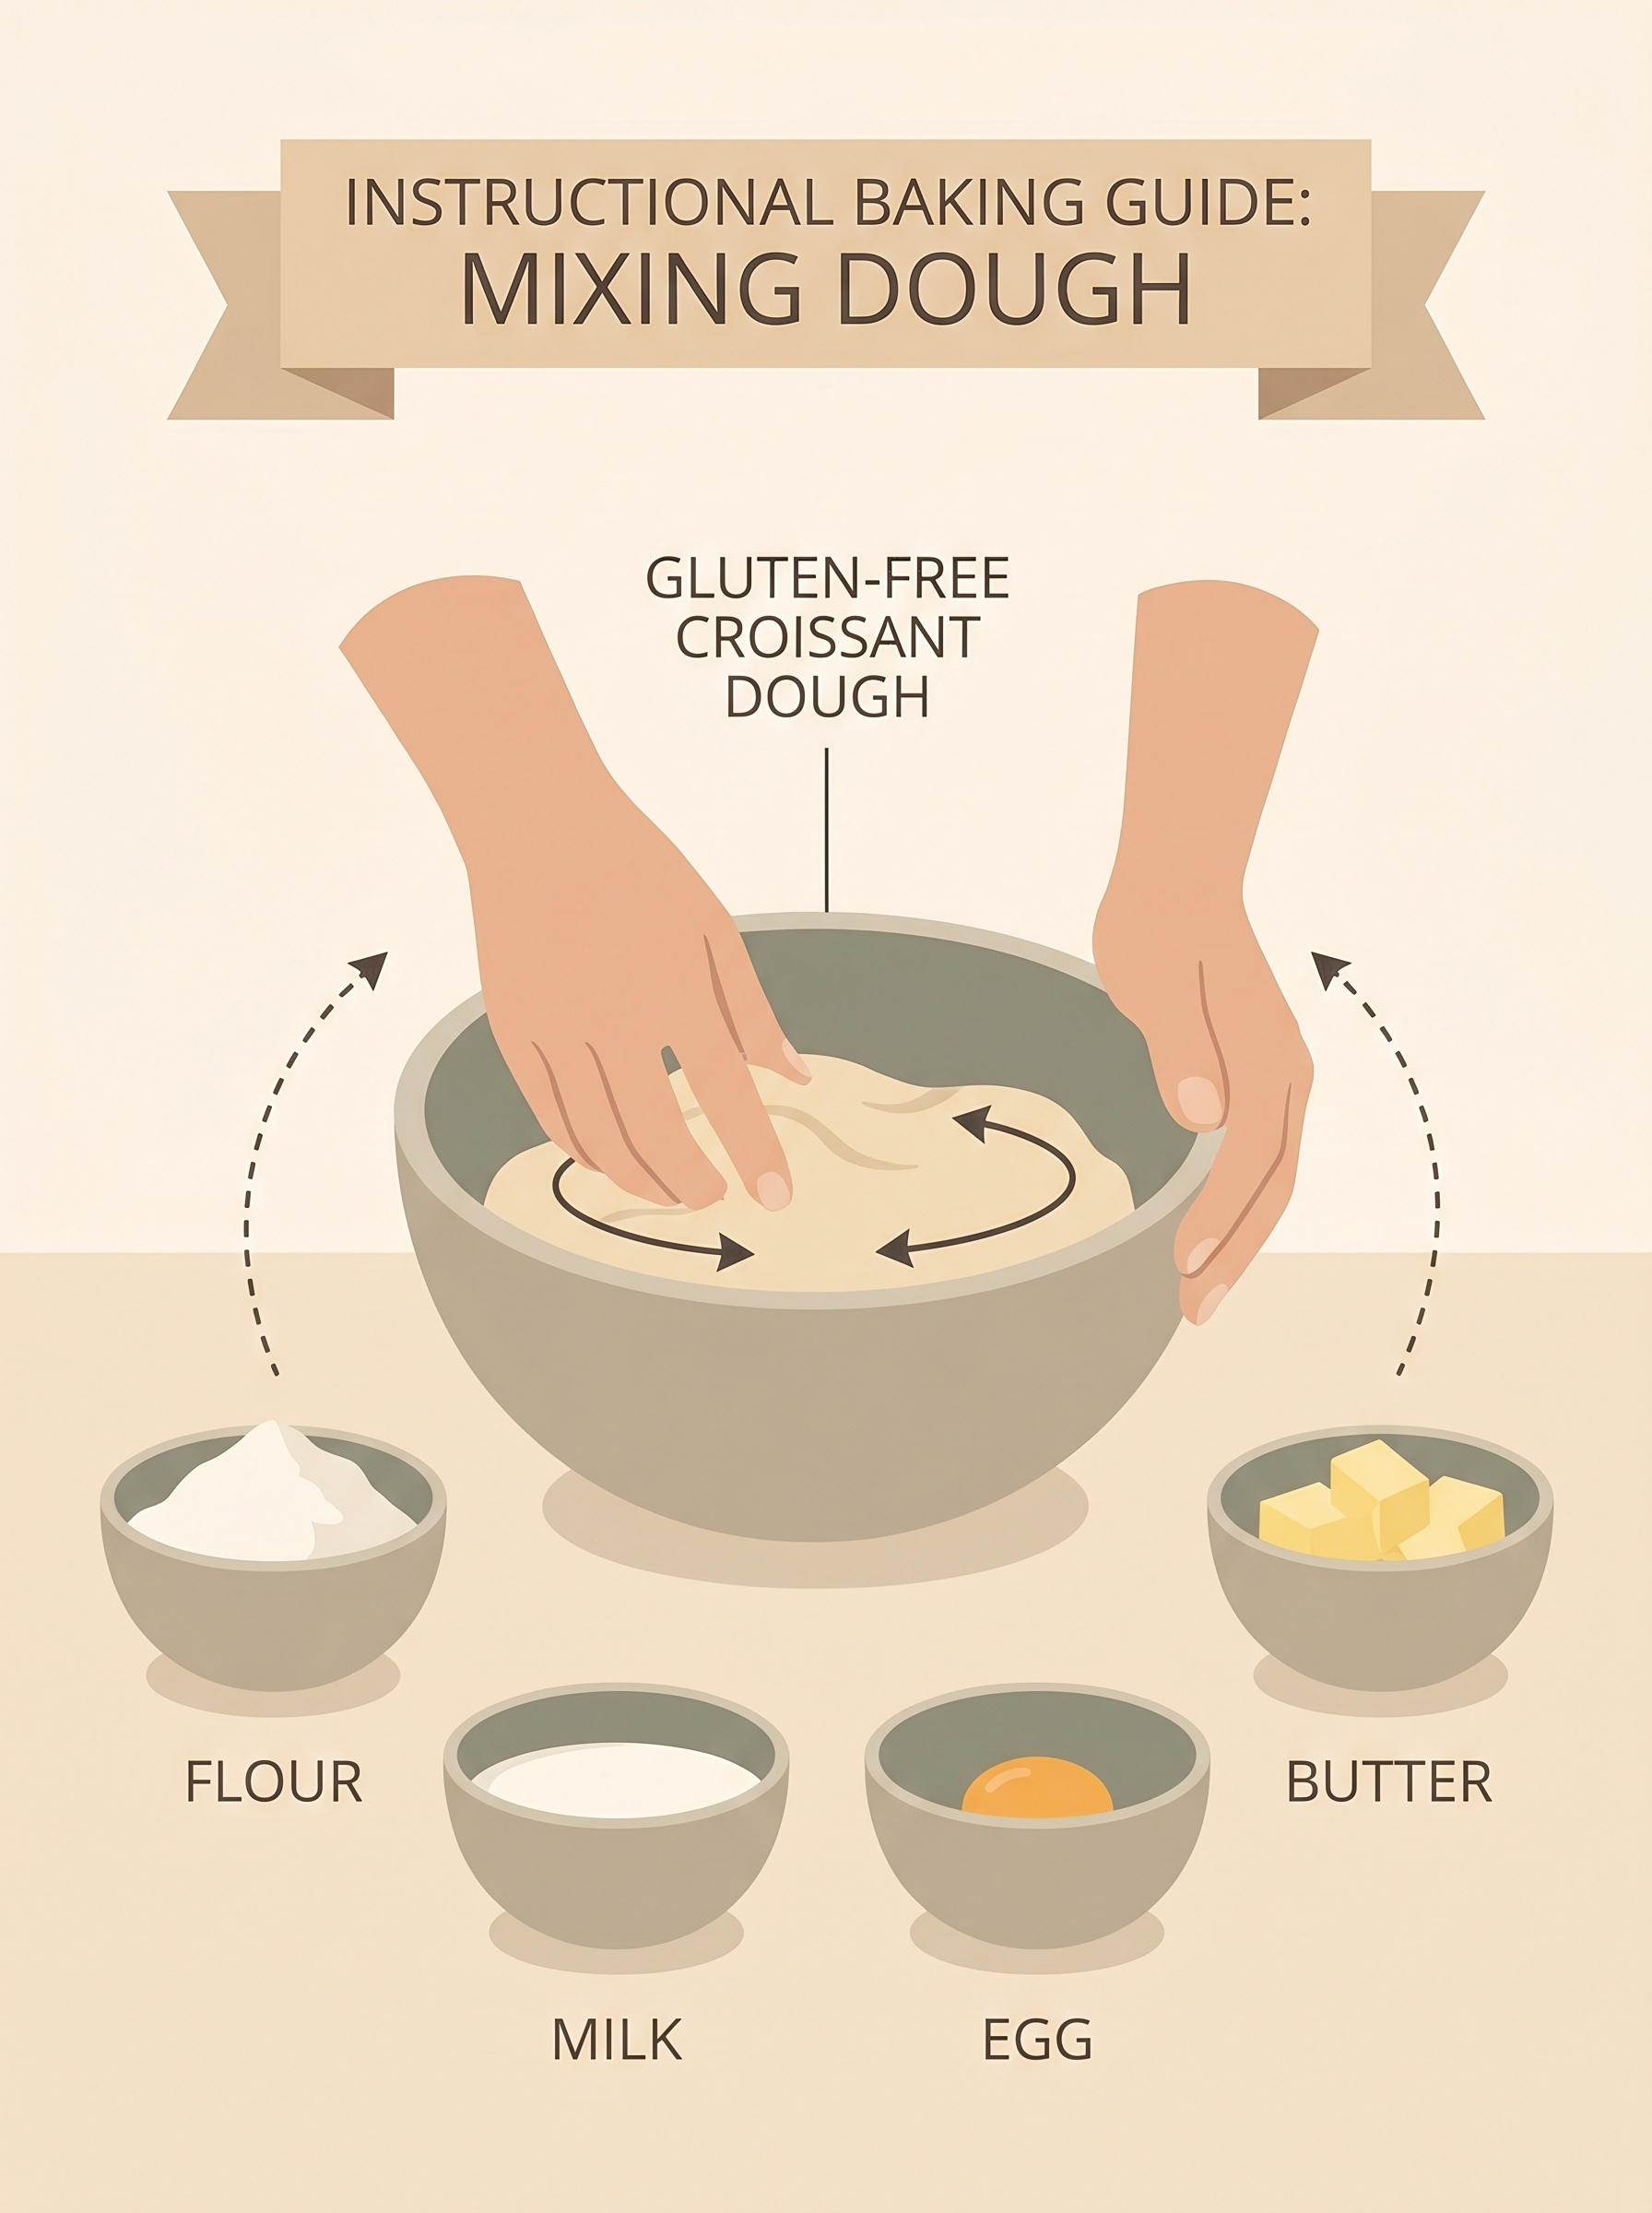
Step 1: Make the Dough
In a large mixing bowl, whisk together the gluten-free flour, psyllium husk powder, xanthan gum if using, sugar, yeast, and salt.
Add the warm milk, warm water, egg, and softened butter. Mix until a soft dough forms. The dough should be slightly sticky but not soupy. If it feels too wet, add one tablespoon of flour at a time. If it feels too dry, add one tablespoon of milk at a time.
Cover the bowl and let the dough rest for about 30 minutes. This gives the psyllium husk time to hydrate and helps the dough become easier to handle.
Step 2: Chill the Dough
Shape the dough into a rectangle, wrap it tightly, and refrigerate for at least 1 hour. This step helps firm up the dough before rolling and folding.
If you want to make the process easier, you can prepare the dough the night before and let it chill overnight.
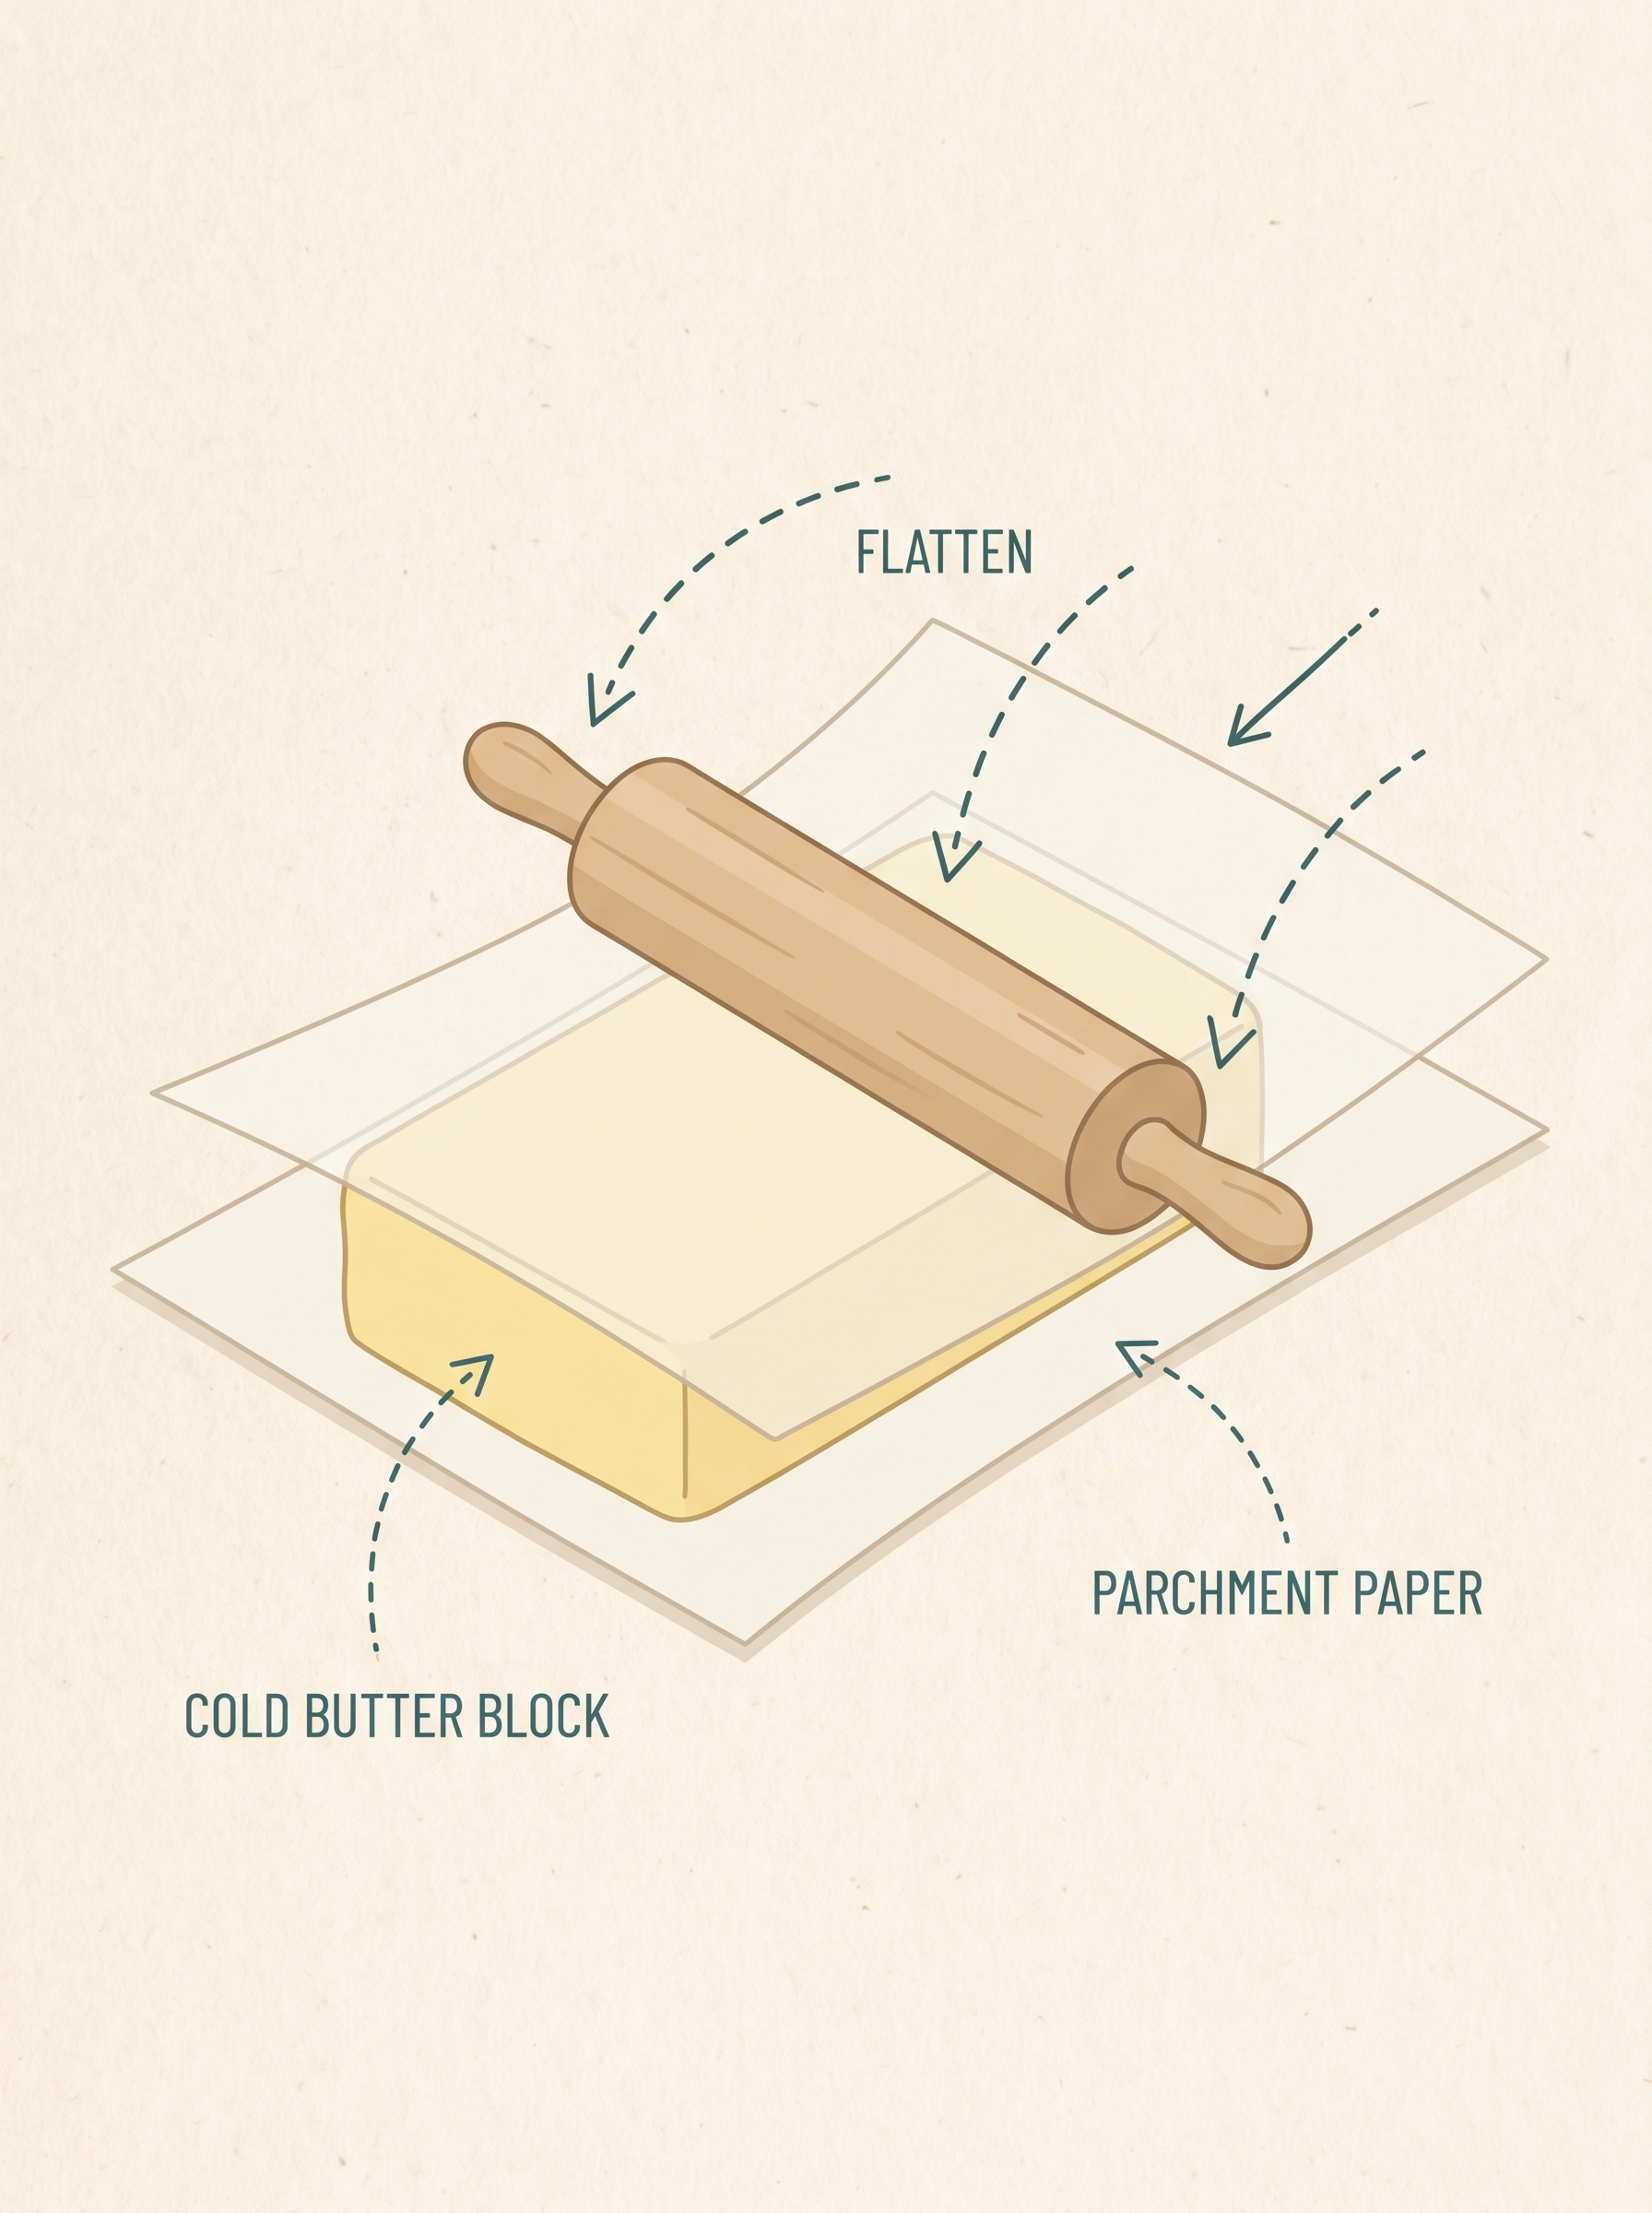
Step 3: Make the Butter Block
Place the cold butter between two pieces of parchment paper. Use a rolling pin to gently pound and roll it into a rectangle, about 6 by 8 inches. The butter should be cold but flexible, not rock hard and not melty.
Place the butter block in the fridge while the dough finishes chilling.
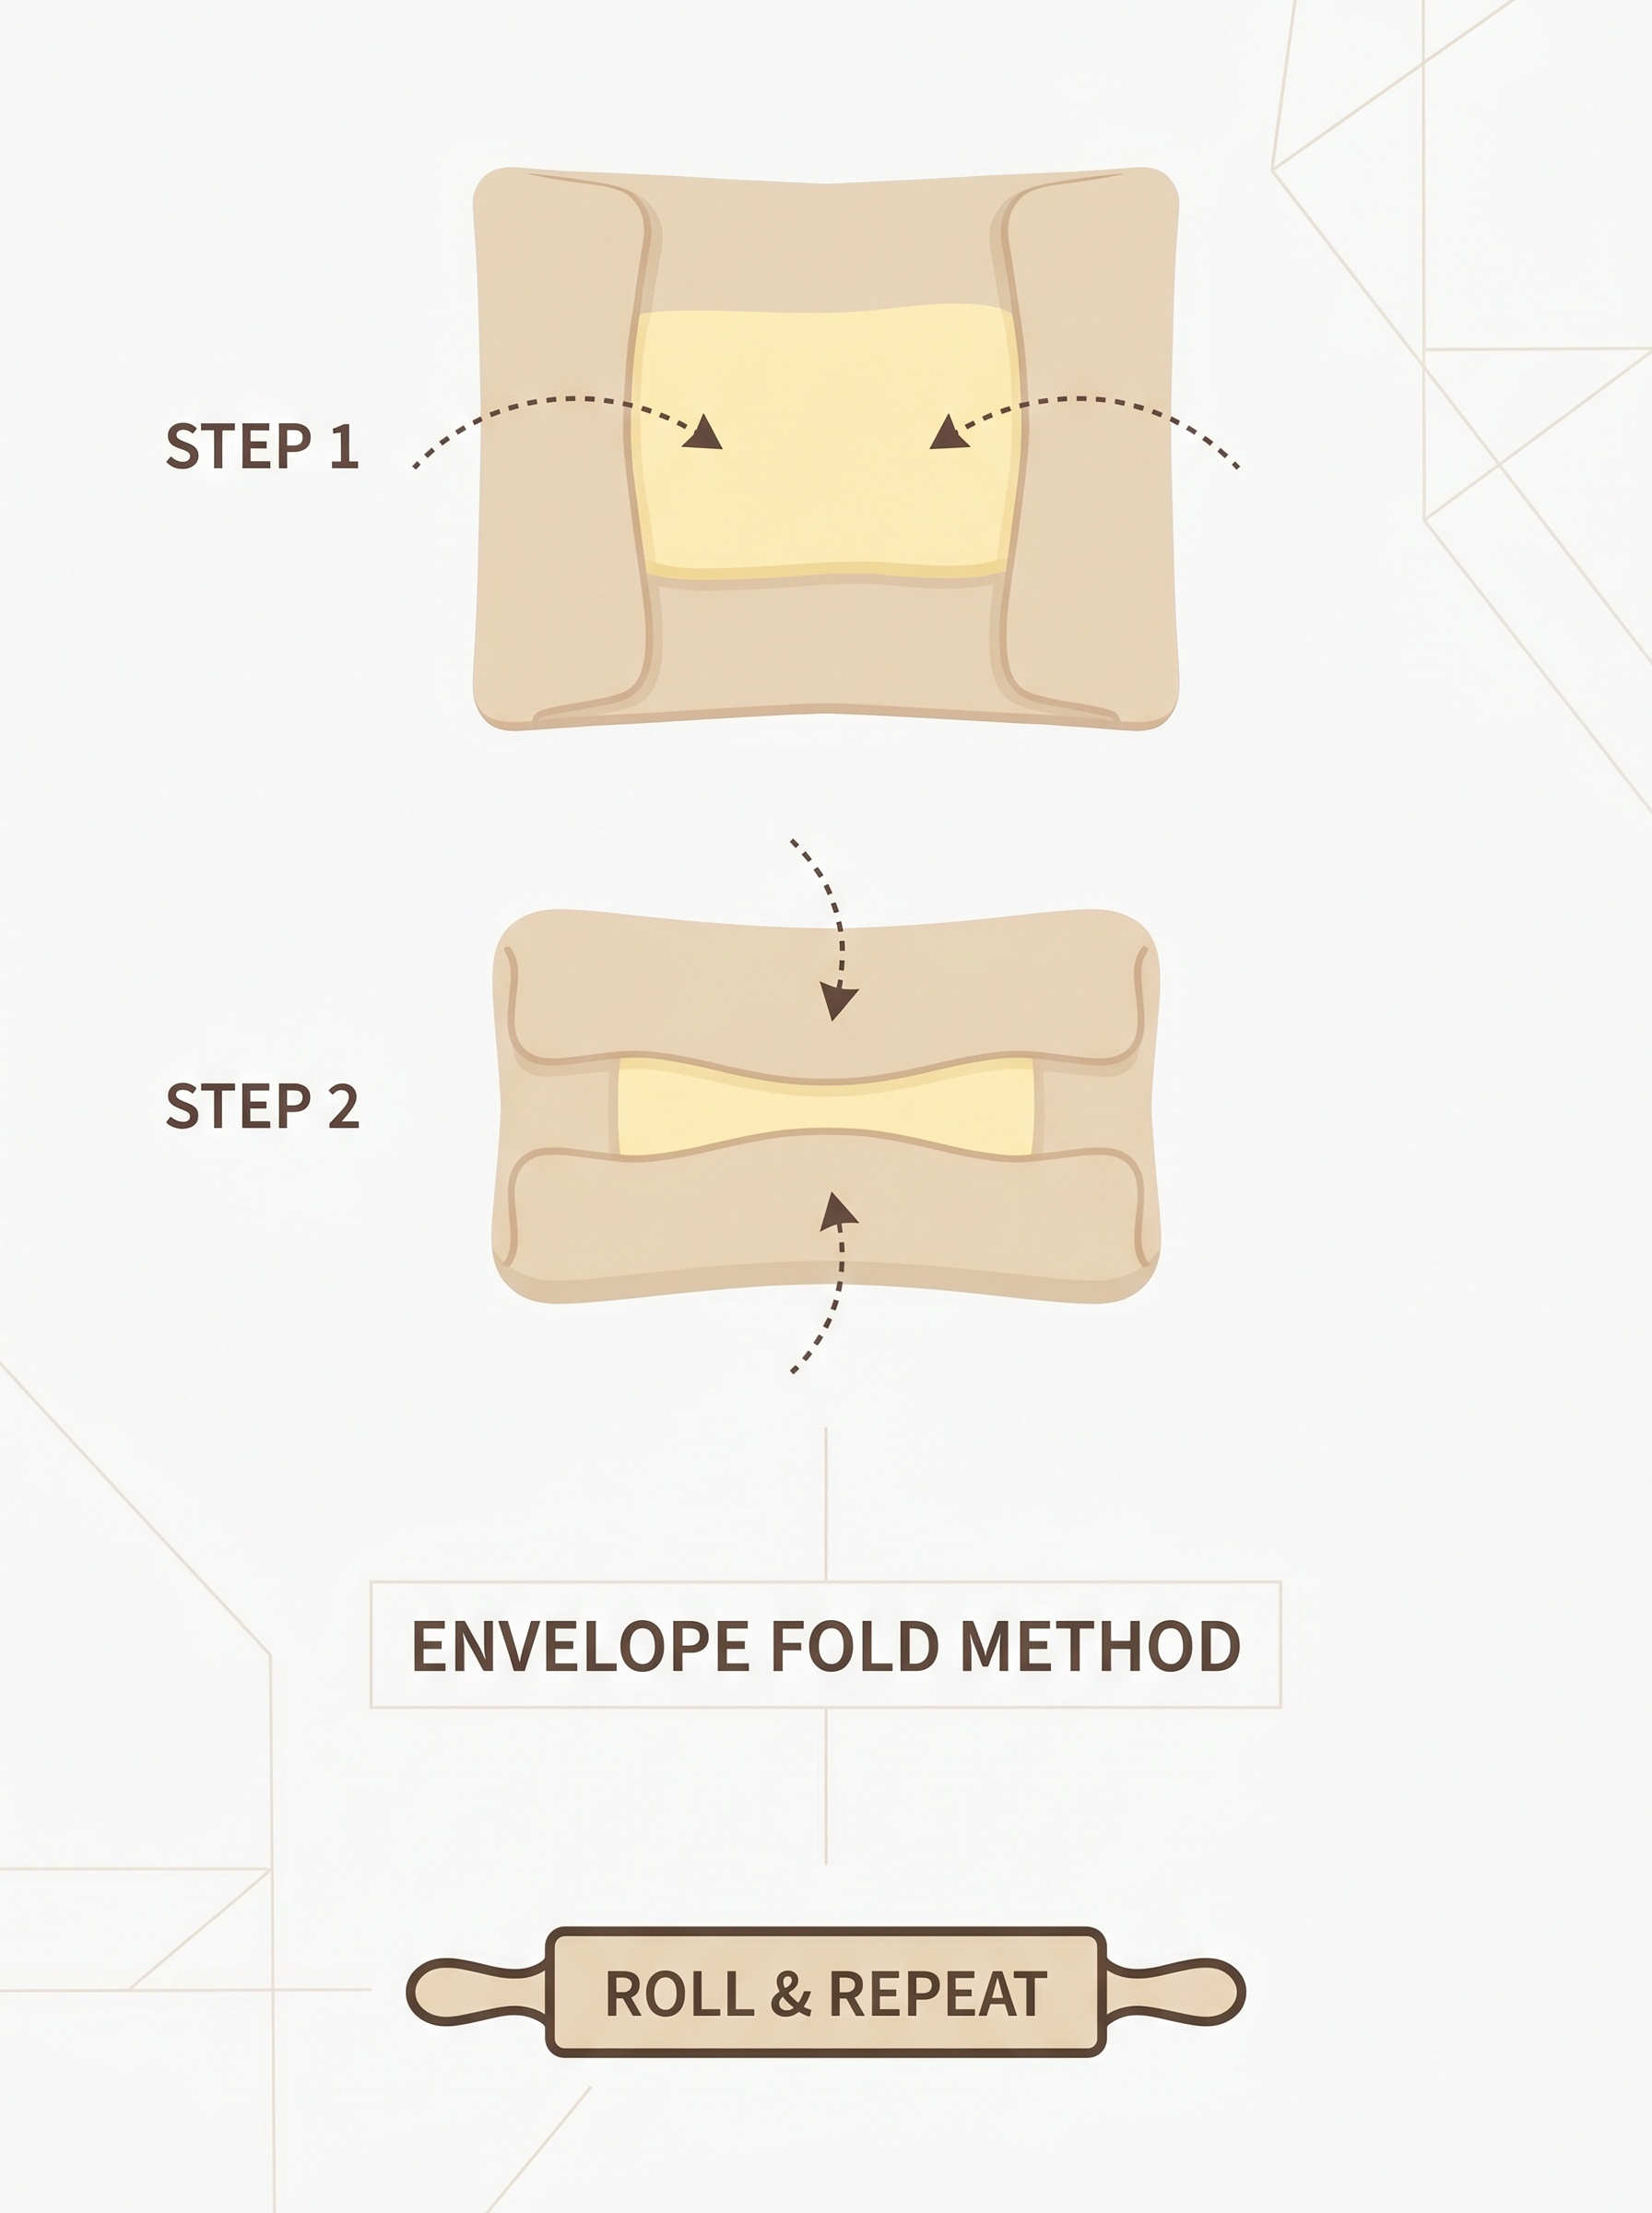
Step 4: Lock the Butter Into the Dough
Lightly dust your work surface with gluten-free flour. Roll the chilled dough into a rectangle large enough to wrap around the butter block.
Place the butter block in the center of the dough. Fold the dough over the butter like an envelope, pinching the edges gently to seal it in.
If the dough cracks a little, do not panic. Smooth it gently with your fingers. Gluten-free dough is more delicate than traditional dough, and a few small cracks are normal.
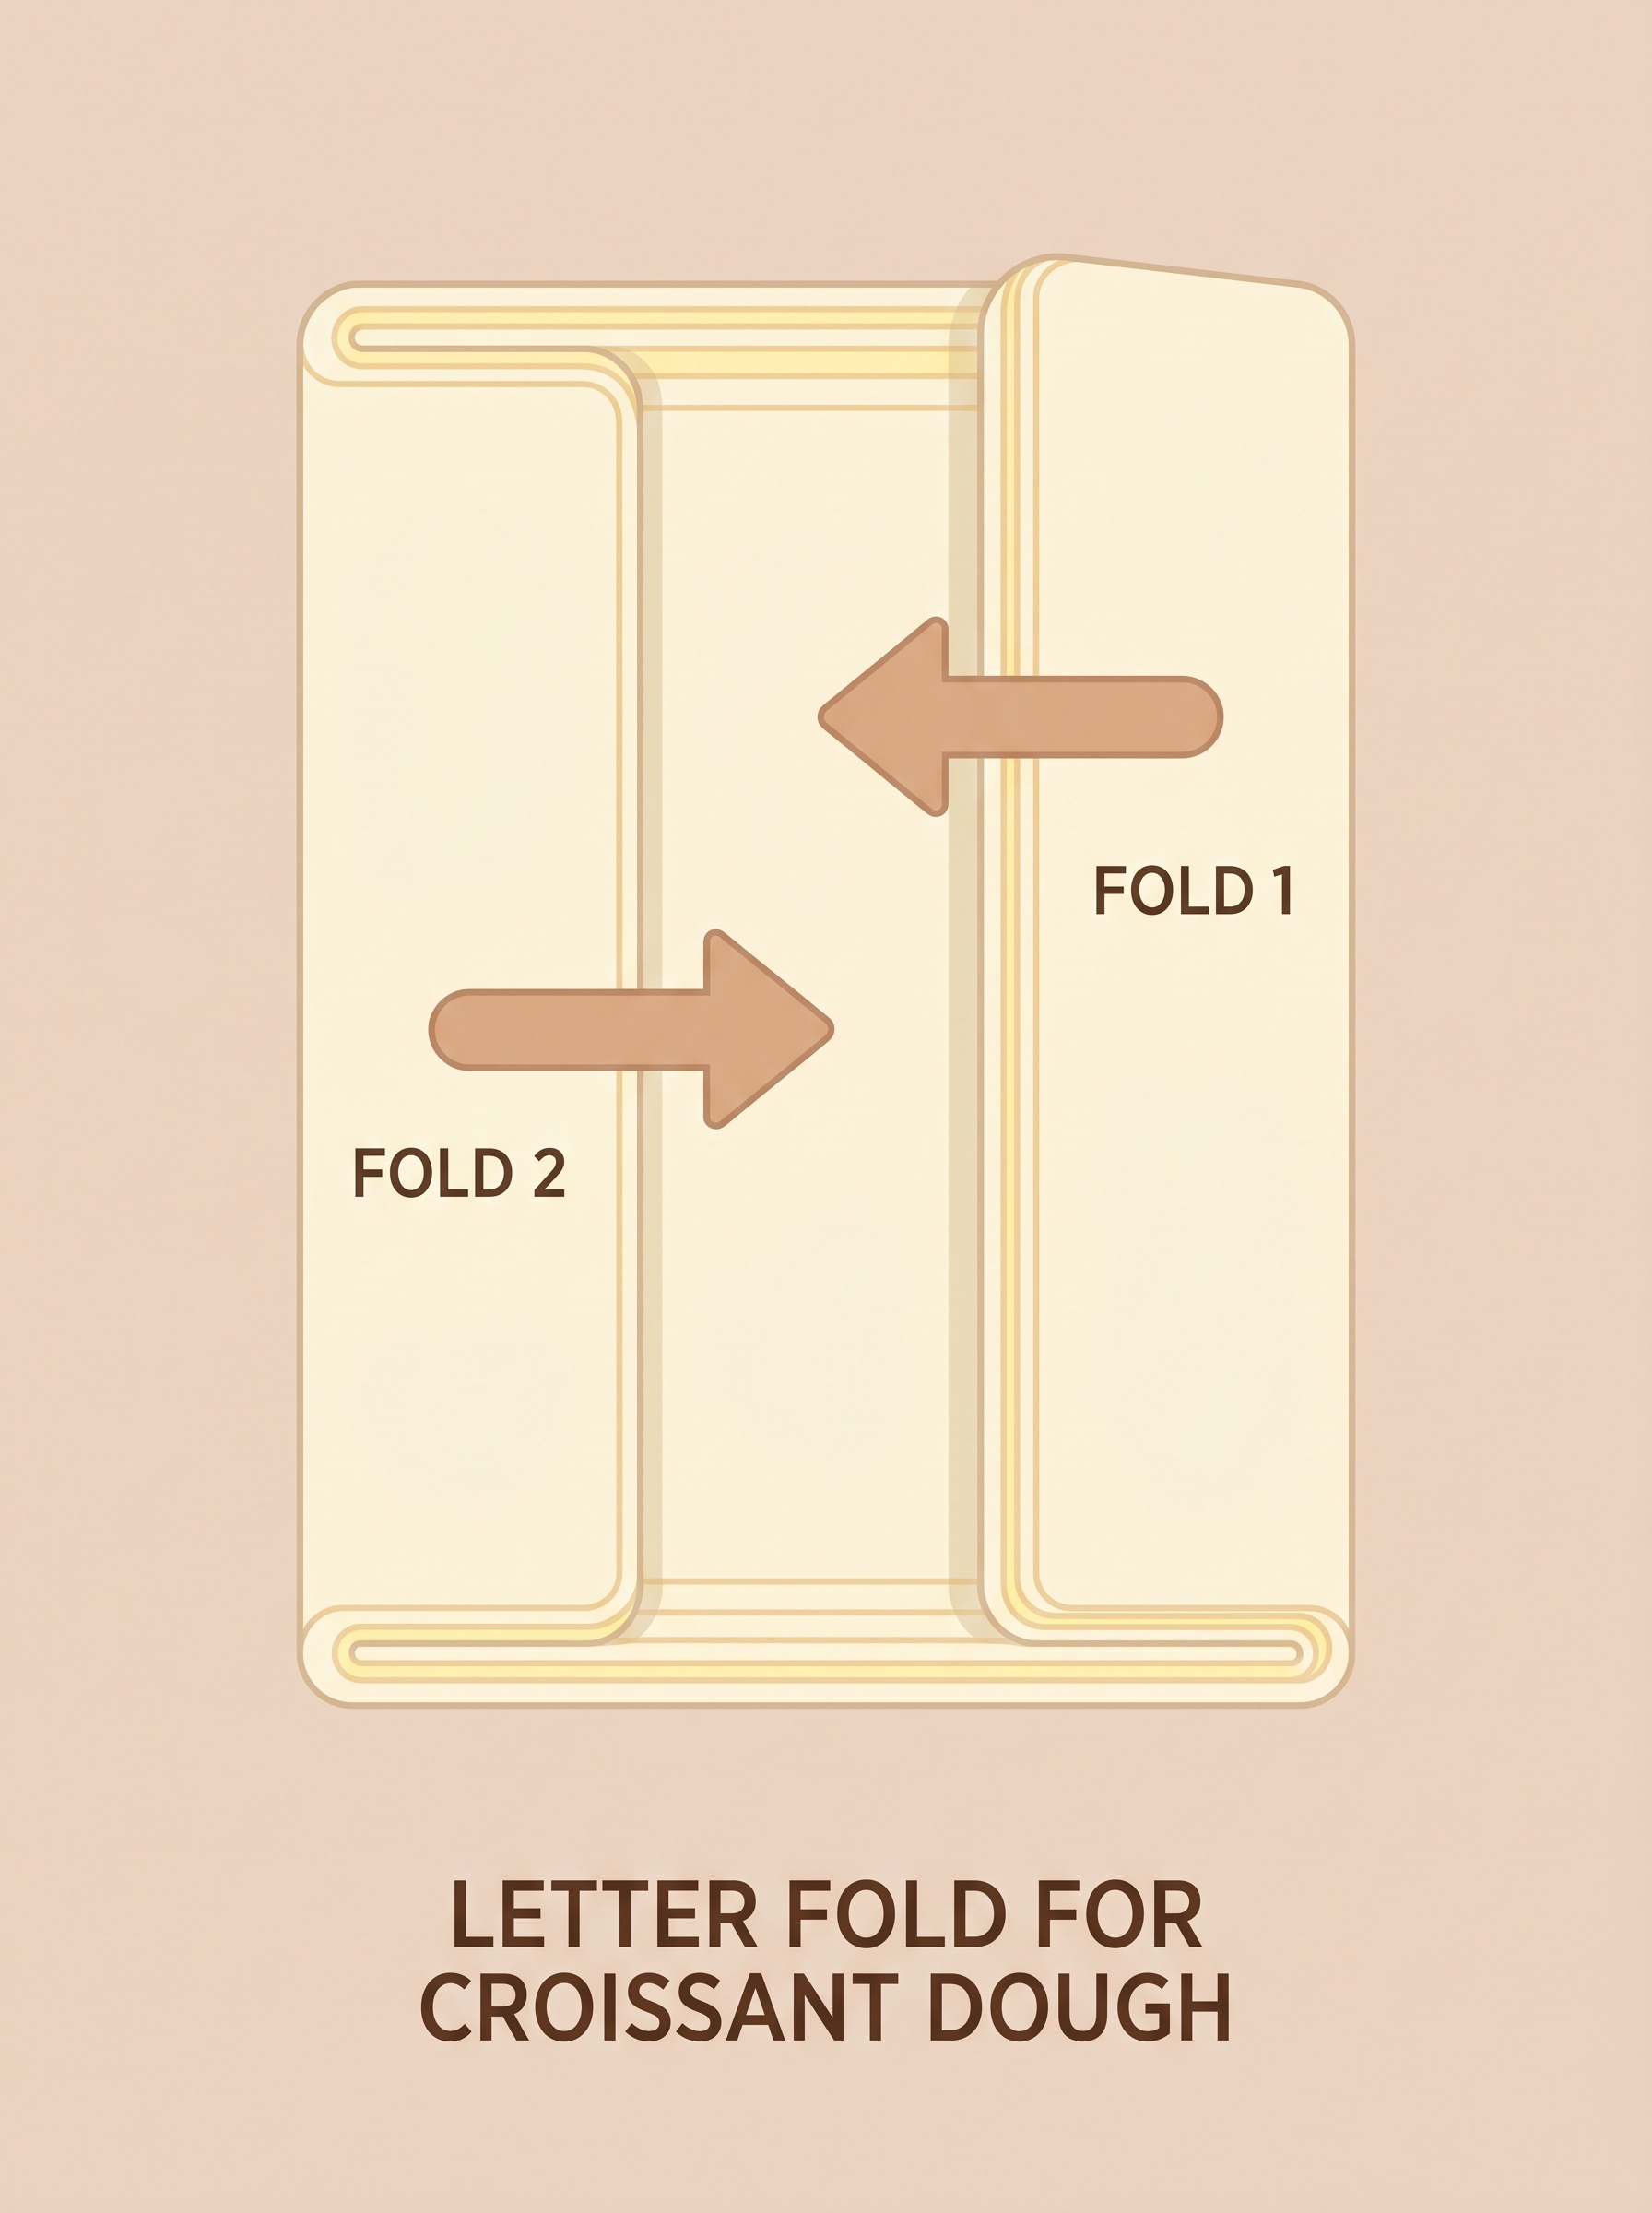
Step 5: Roll and Fold the Dough
Roll the dough into a long rectangle. Fold it into thirds, like folding a letter. This is your first fold.
Wrap the dough and refrigerate for 30 minutes. Repeat the rolling and folding process two more times, chilling for 30 minutes between each fold.
This folding process creates the buttery layers that make croissants flaky. It takes a little patience, but it is also the part that makes the final result feel special.
Step 6: Shape the Croissants
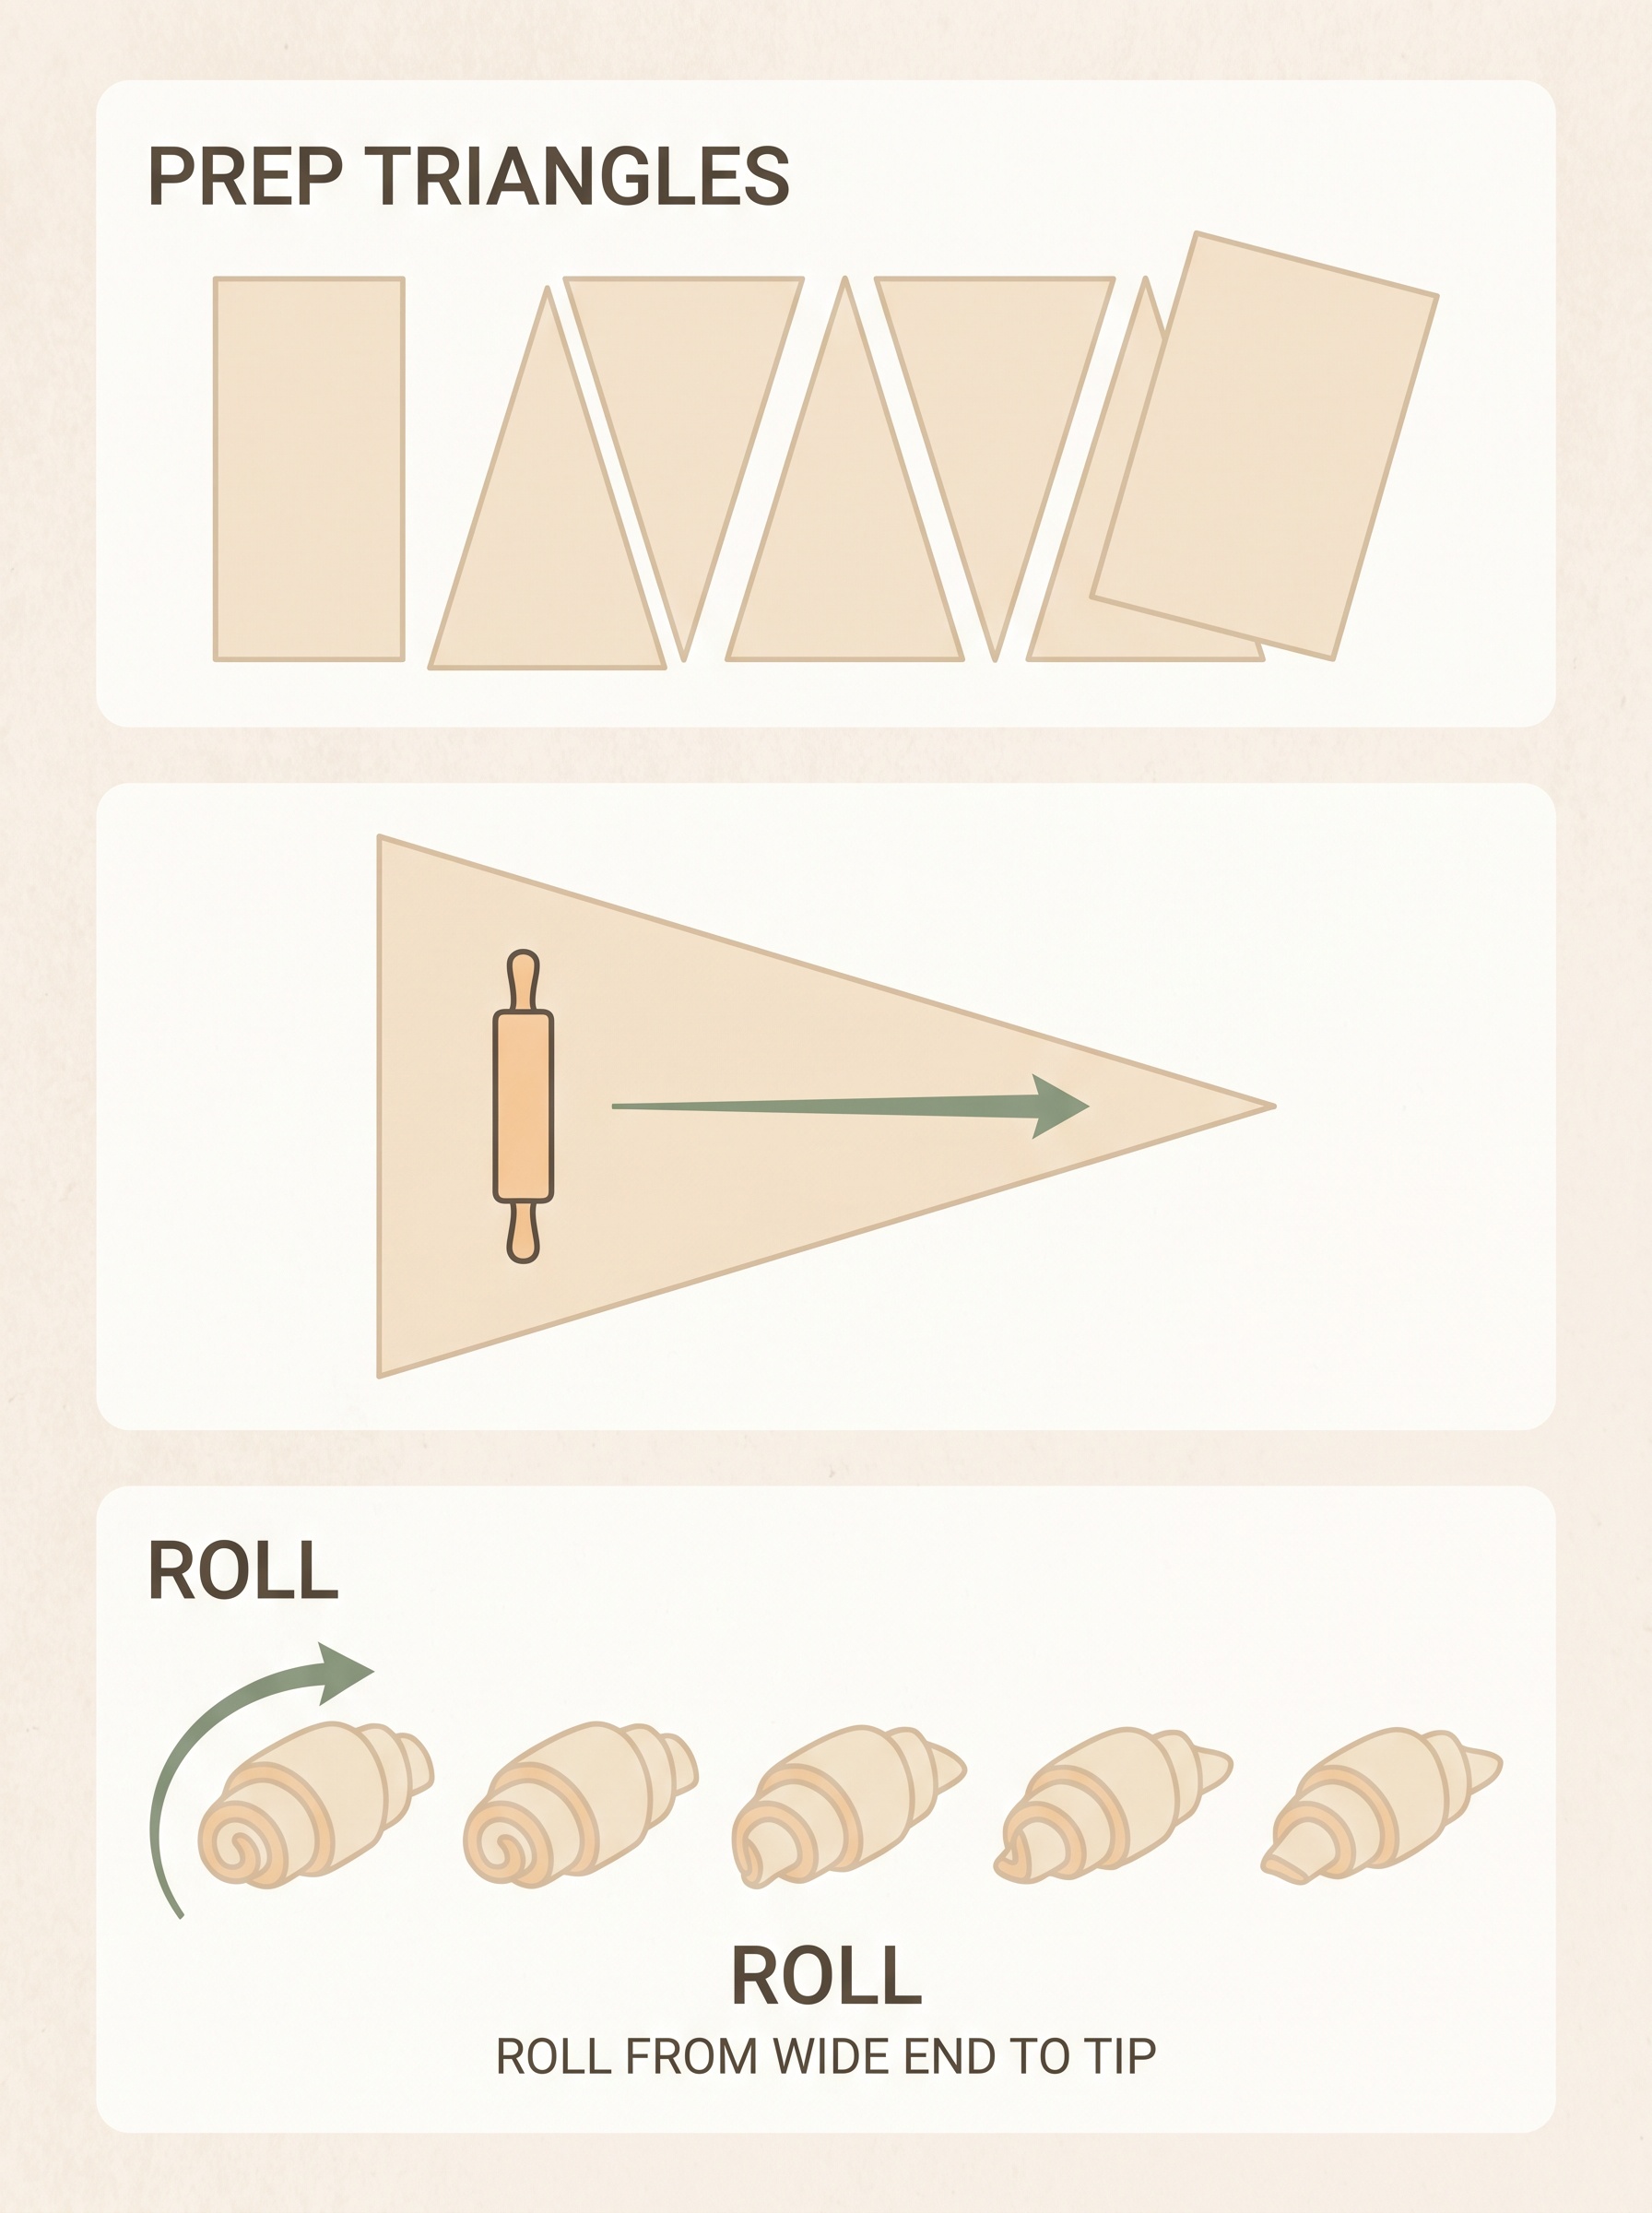
After the final chill, roll the dough into a large rectangle about 1/4 inch thick. Trim the edges if needed, then cut the dough into long triangles.
Starting at the wide end of each triangle, gently roll the dough toward the tip to form a croissant shape. Place each croissant on a parchment-lined baking sheet with the tip tucked underneath.
Curve the ends slightly inward if you want that classic croissant shape.
Step 7: Let the Croissants Rise
Cover the shaped croissants loosely with a clean towel and let them rise in a warm spot for about 45 to 60 minutes. They should look slightly puffed, but they may not double dramatically like traditional wheat croissants.
Be gentle here. Over-proofing can make gluten-free dough fragile, so aim for softly puffy rather than huge and airy.
Step 8: Brush and Bake
Preheat your oven to 375°F.
Whisk together the egg and milk to make the egg wash. Gently brush the tops of the croissants, being careful not to press down too hard.
Bake for 20 to 25 minutes, or until the croissants are golden brown and baked through. If they brown too quickly, loosely tent them with foil for the last few minutes.
Let them cool for at least 10 minutes before serving. The texture settles as they cool, and yes, this is the hardest part.

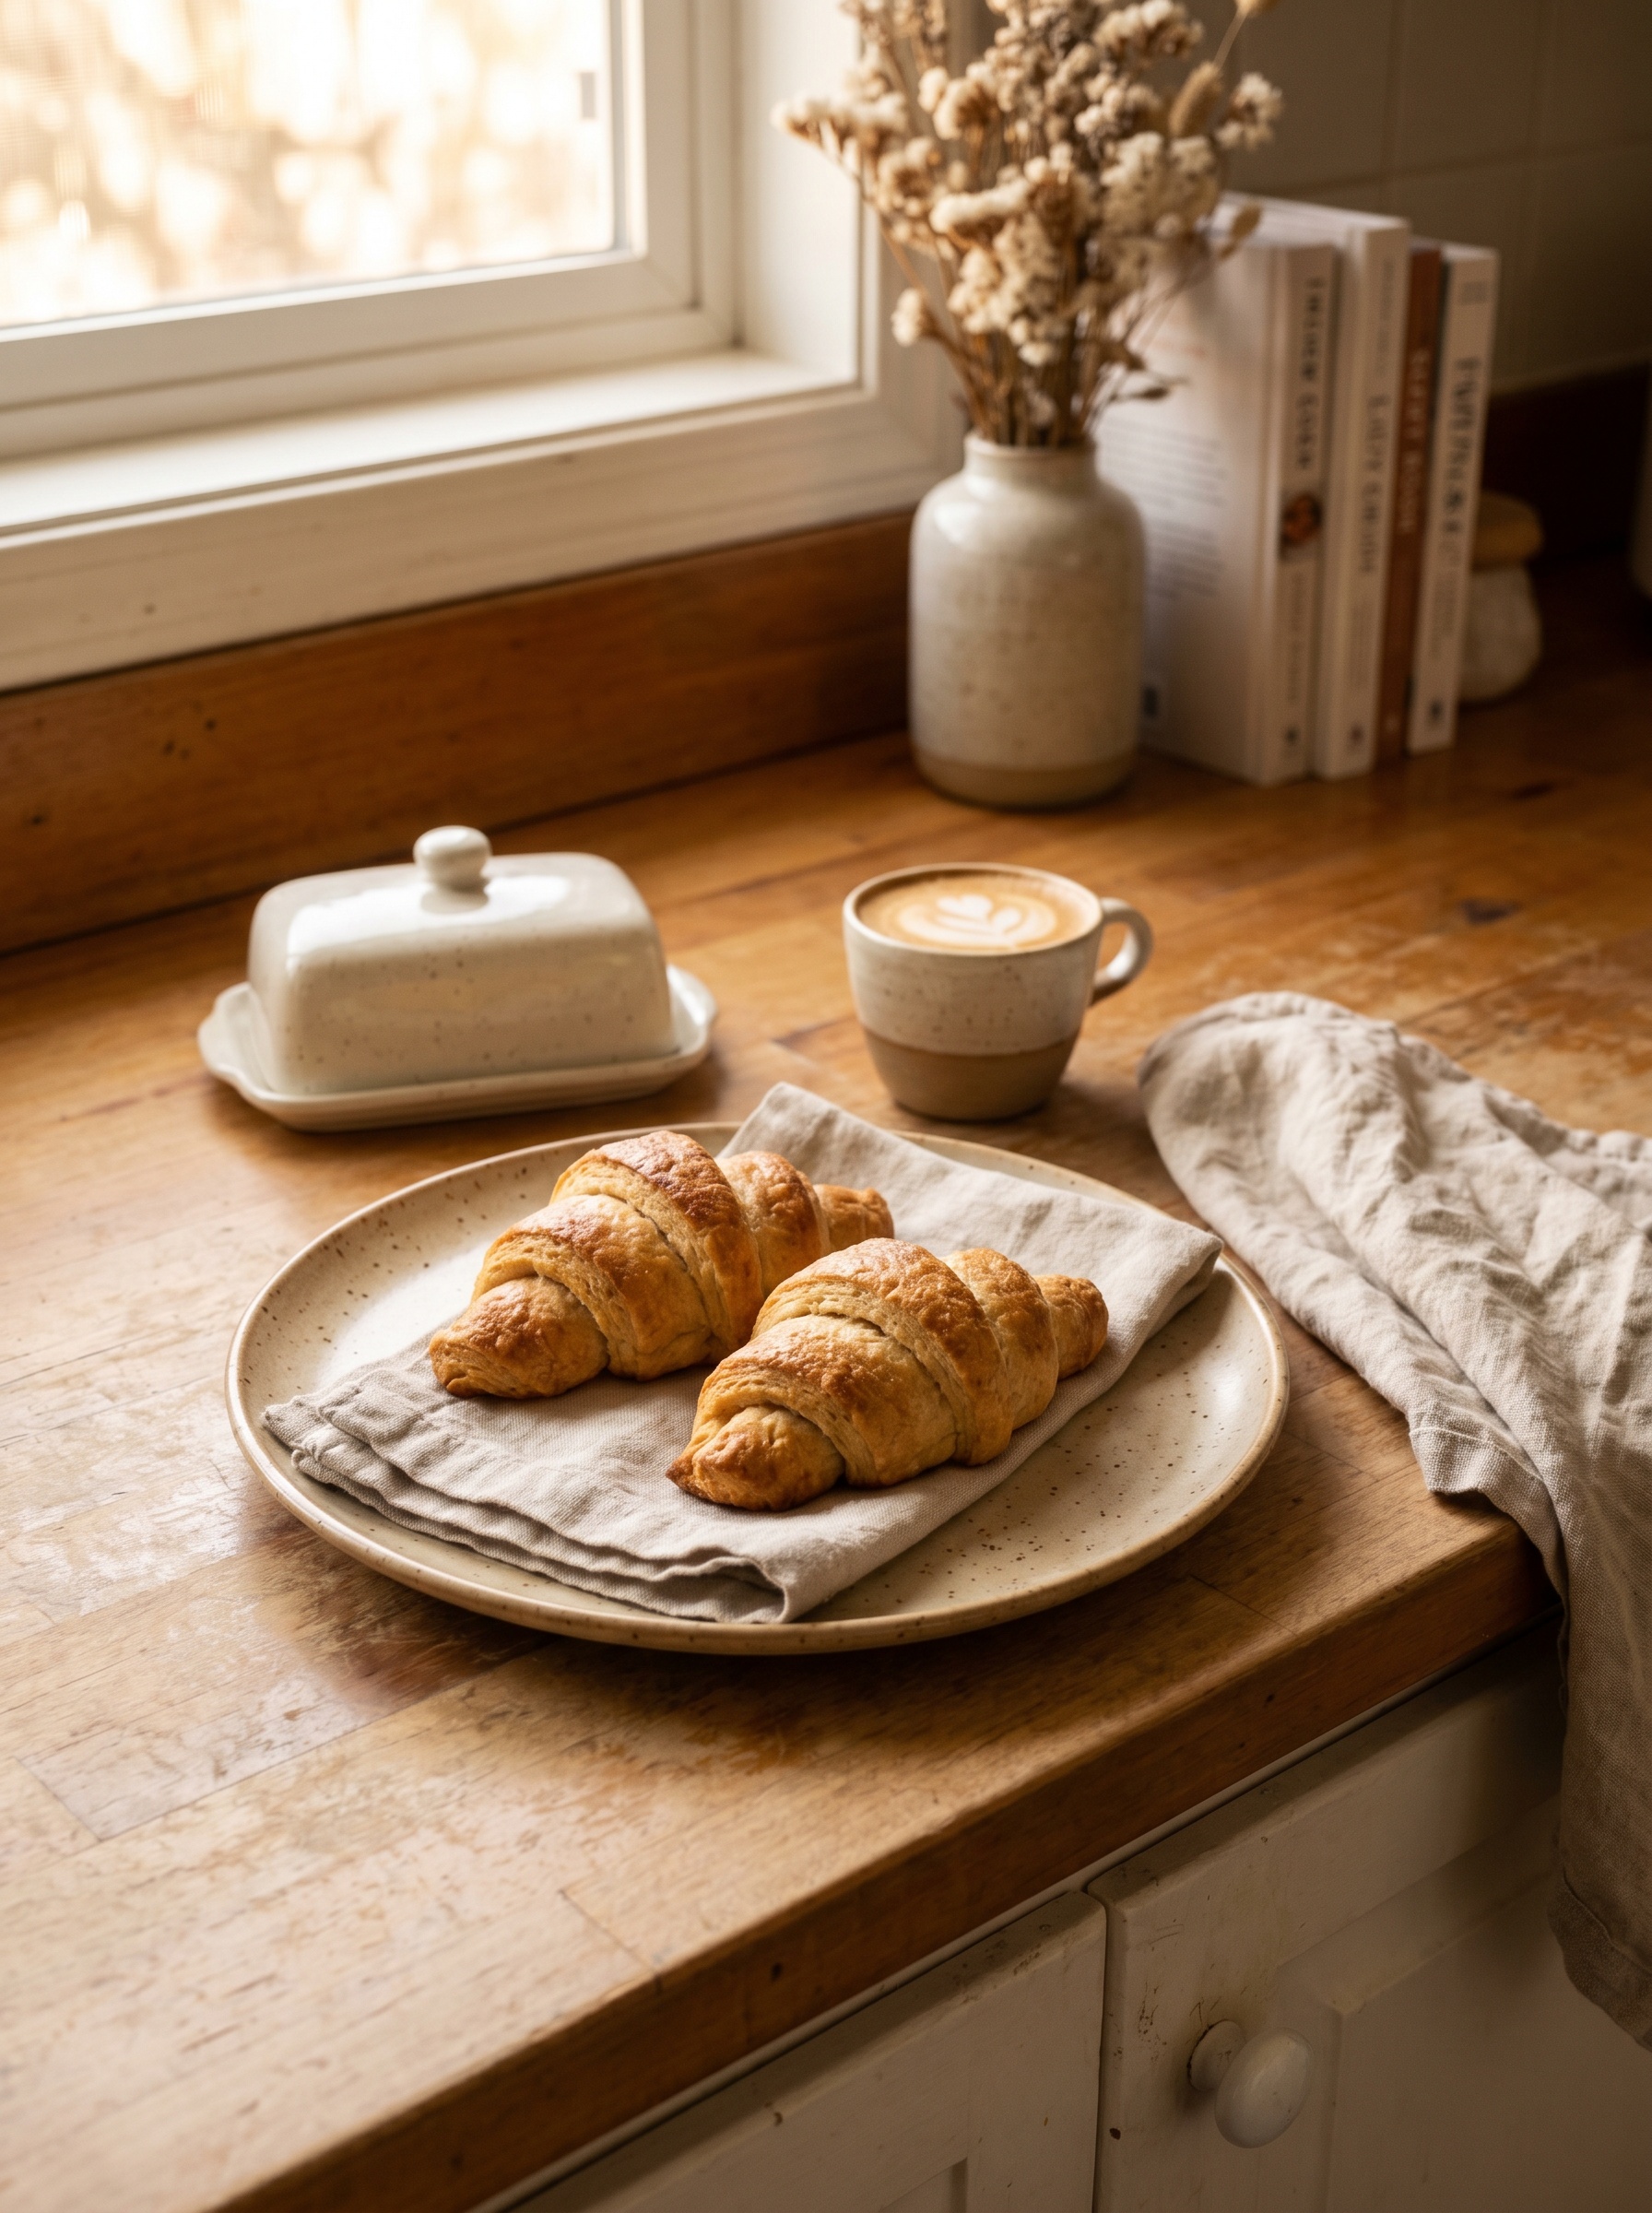
How to Serve Gluten-Free Croissants
These croissants are lovely warm with a little butter, jam, or honey. They also work beautifully with a cozy breakfast plate: scrambled eggs, fruit, coffee, and a quiet morning if you can find one.
For a sweeter version, you can add a small piece of chocolate before rolling each croissant. For a savory version, try a little cheese inside before baking.
Storage Tips
Gluten-free baked goods are usually best the day they are made, and croissants are no exception. Store leftovers in an airtight container at room temperature for up to 1 day, or freeze them for later.
To reheat, place croissants in a 300°F oven for a few minutes until warm. This helps bring back some of the flaky texture.
Troubleshooting Gluten-Free Croissants
Why is my dough cracking?
Gluten-free dough is more delicate than wheat dough. If it cracks, it may be too cold, too dry, or rolled too quickly. Let it rest for a few minutes, then continue gently.
Why did my butter leak out?
This usually means the butter became too warm or the dough was not sealed well enough. Chill the dough whenever it starts to feel soft.
Why are my croissants dense?
They may need a little more rising time, or the dough may have been too dry. Gluten-free croissants will naturally be a bit different from classic croissants, but they should still be tender and layered.
Final Thoughts
Making gluten-free croissants at home is definitely a slow baking project, but it is also a very satisfying one. There is something lovely about rolling dough, folding butter, waiting patiently, and ending up with golden little pastries that feel special.
They do not have to be perfect. They just have to be buttery, flaky, cozy, and made with a little patience.
Small shifts, big vibes — and maybe one more croissant.